Bees sure are getting lazy these days!

This month at the MEKA (miniature meeting) we got a goodie bag. All the
little bits you need to make a miniature 1 inch scale ottoman.
Step 1 (What you need):
The goodie bag contained some foam and some small pieces of wood. (I already stained and glued some of the pieces below).
 |
| Bits to make a miniature ottoman |
All that was needed to assemble this ottoman was some glue and a tiny piece of fabric. Ok.. got the glue, now for the fabric. I did not have a single scrap! I tried cutting up a table cloth. It looked terrible. Then I tried cutting up a sock. It was not really that clean when I held it up to the light and kind of thin. Then I looked at the cat toys... the catnip pouches are bright and have tiny patterns on them. PERFECT!
 |
| Very potent catnip pouches |
Even after I dumped the catnip out, they still smell like the herb.
Step 2: Glue the wooden base to the foam square.
 |
| Gluing a wooden base to the foam. |
Step 3: tape the fabric to the foam block. Make sure it is tight and do the corners like you would wrap a present. If you suck at wrapping presents, you will probably suck at this too.
 |
| Tape the fabric to the foam. I used tape because I was afraid of glue. ... |
 |
| tape the fabric to the cushion |
Step 4: glue the legs to the base. You should use wood glue. I did not. I was impatient and could not find the wood glue.
 |
| Gluing on the legs. |
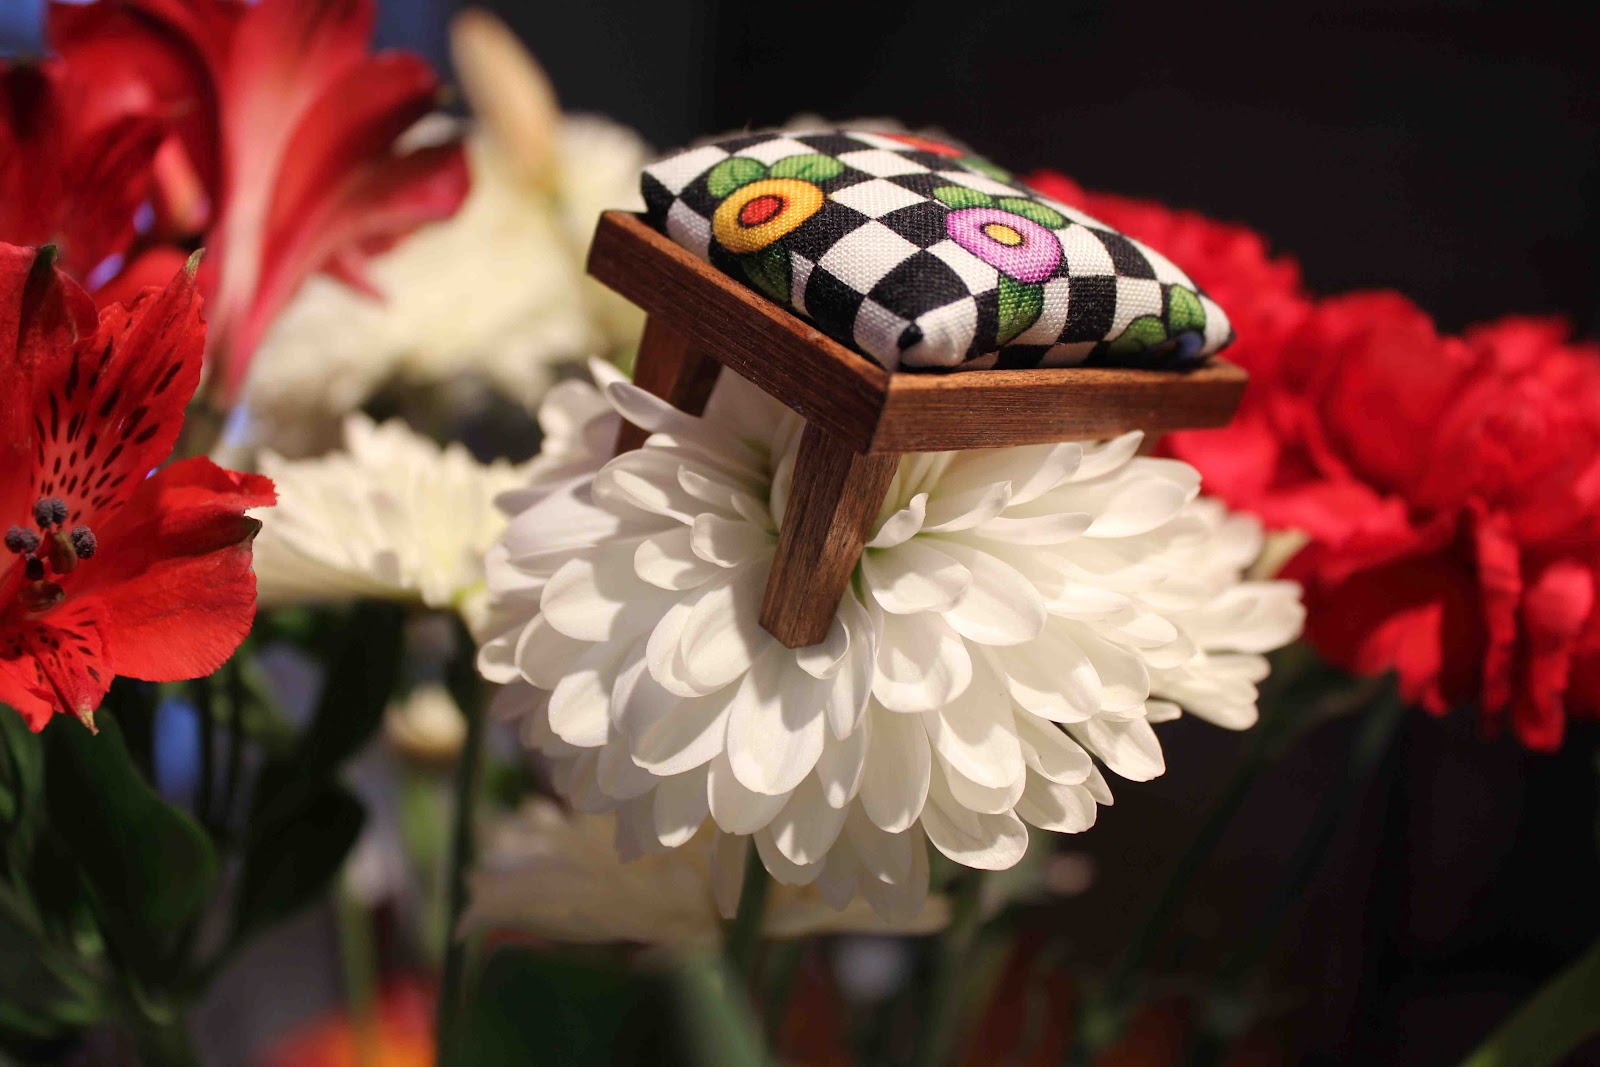
Step 5: Put it all together. I sanded the base to the exact size of the little frame. They fit right in together without the use of glue.
 |
| DIY dollhouse ottoman |
 |
| All done!. DIY Dollhouse Ottoman made from a catnip pouch and bits and pieces. |
 |
| DIY dollhouse ottoman |
 |
| Bees sure are getting lazy these days! |